In this post I will show you how to build a mini home photo studio suitable for photographing small pets or creating still life product shots.
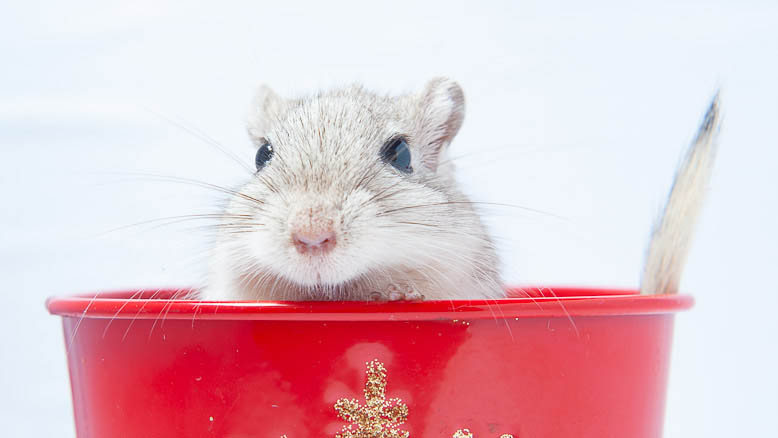
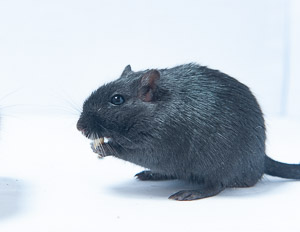
My journey into building a mini photo studio began when I wanted to try and get some good photographs of the family pet gerbils. I had previously tried to photograph them on a flat backdrop but they kept running away. I had also tried using a box lined with a white sheet but this didn’t work either. What was needed was an enclosed space, big enough for them to move about but not so big they would always be out of shot. It also needed to have a plain background that they couldn’t hide behind. This was when I had the idea to build a mini photo studio that was enclosed and specifically for the propose. It can of course be used for photographing other subjects that haven’t got such a tendency to run away.
Materials Needed
To build a Mini Home Photo Studio like the one I created you will need:
- (1) A large cardboard box – mine measured 16″ x 18″ x 23″
- Some white paper
- Glue – dilute PVA or wallpaper paste
- Parcel tape
- Craft knife
Method of Construction
Start by opening the top and bottom flaps of your box, keep all the flaps in place for now as they will make it easier for the next step.
Spread glue on the inside “walls” of the box and cover with the white paper (2), don’t worry if the paper looks wrinkled it will smooth itself out as it dries. Fold the flaps in slightly so the box doesn’t collapse while you are gluing. I found it useful to allow the bottom of the paper to go past the fold and onto the bottom flaps a short distance.
Allow the “walls” to dry before re-folding the bottom flaps to make the base of the box. Tape the bottom closed and glue a piece of white paper over the bottom to make it white. If your box flaps don’t meet and create a completely level base, you can use one of the top flaps to level off the bottom. Leave the whole lot to dry overnight (3).
When the glue is dry, remove the remaining top flaps from the box
Choose one of the box ends to be the shooting end. Draw a circle in the middle of the bottom edge a little way up from the bottom. My circle was about 4″ diameter to fit my large lens, a smaller lens will not need such a large hole. Keep the circle close to the bottom of the box (1″-2″). This will give your a rodents-eye view of your subjects. Carefully cut around the edge of the circle and push out the card disk. Keep the disk it is useful for blocking up the hole when you’ve got your “models” in the studio.
Your studio is now ready to use.
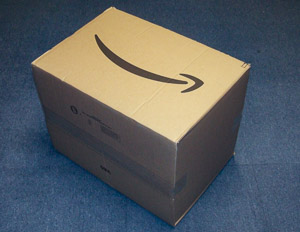
(1) – Start with a large cardboard box |
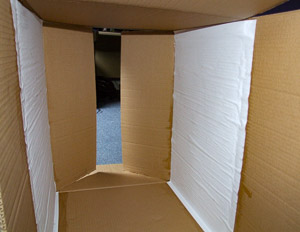
(2) – Line the box with white paper |
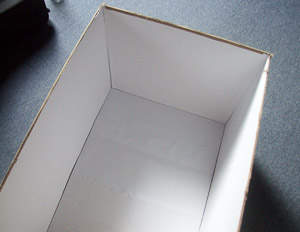
(3) – Allow the glue to dry & remove the flaps |
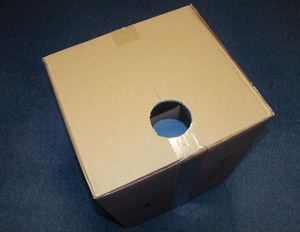
(4) – Cut a hole for your camera lens |
How to Use your Mini Photo Studio
I set up my mini studio with the lights I had available. I used one speed-light flash units and an LED ring flash both on stands shining into the studio. If you haven’t got a flash you can use off-camera experiment with other lighting like the on-camera flash or try a bright torch, desk lamp or inspection light.
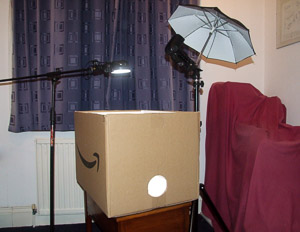
Stage (5) – My set-up |
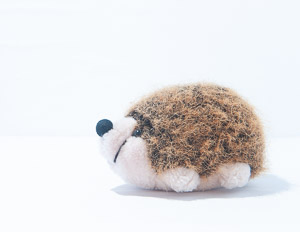
Stage (6) – Stand-in Model |
I didn’t want to cause distress to the gerbils while I was setting up my lighting. So I found a stand-in stuffed toy to act as a model. This allowed me to play about with the flash settings until I was happy with the result.
How to Focus
Small animals move quite quickly and can be tricky to focus on. Initially I used the stand-in model to set my focus before capturing the gerbils. This worked but I had to make sure the animals were in the right place in the shot. I put some of their favourite treats in the studio in the place I wanted them to sit but this wasn’t overly successful as they like to eat sitting in a corner. Adding a prop to the studio is also useful to help keep them in the middle of the shots. In the end I let the gerbils get used to the studio and used auto-focus to capture them as they ran about and explored their new surroundings.
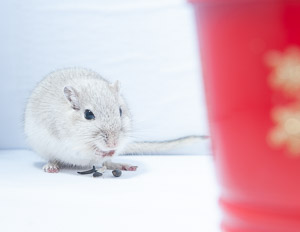
The Results
I took a lot of shots, some were misses but I did manage to get some nice clear images, see above and below.
 |
 |