As the evenings draw in and dusk begins to coincide with rush hour, don’t be tempted to head indoors with your camera. Why not take your trusty tripod out for an evening shooting long exposure photos? And create some abstract traffic trails photography. This is exactly what I’ve been experimenting with over the past few weeks around my local town of Tavistock in Devon. At several locations around the town I’ve set up my tripod and risked the odd looks from passing strangers and set to work capturing the town in a very different light.
I like this type of photography because you never really know what you are going to get until the shutter is finally closed at the end of the exposure. I first experimented with traffic trails in the days of film when you had to wait until the film was processed to realise you’d got everything wrong, not only wasting time but also money. At least with digital I am free to snap away to my hearts content at no risk other than a few bizarre looks and the odd question. Thankfully the good people are a polite bunch and I’ve not been threatened as has happened when trying this in other places.
Long exposure traffic trail photography is always haphazard. Don’t be afraid to experiment to find out what works best for you and your equipment.
Below are a few tips and settings that work for me:
Traffic Trail Photography Equipment
- A sturdy tripod is a must. You can’t hold your camera for ten seconds or more so you need to mount it on something. If you haven’t got a tripod find somewhere safe you can wedge the camera still.
- Camera with manual mode or at least one where you can select the shutter speed.
- A Cable Release is useful but if you haven’t got one use the self timer function so that you don’t move the camera when you press the shutter.
Traffic Trail Locations
Find a safe location where you’re going to be able to capture vehicles going in different directions. Doing this will mean you’ll get both white and red trails in your picture. I find road junctions and roundabouts work well. I also like to have a static element in my picture like a statue or road sign. I find this gives the picture more interest and gives you something to focus on.
Camera Settings
Settings will vary from camera to camera and will depend on how dark it is and how much traffic there is, as a rough guide I find about a 10-second exposure works well to give long enough trails of light without being overexposed. I always use ISO200 to get the best image quality and adjust the aperture up and down to get the right exposure. I usually aim for a slight underexposure so the lines of light don’t burn out. If there’s a lot of traffic use a smaller aperture and experiment with a shorter exposure, for light traffic try with longer exposures.
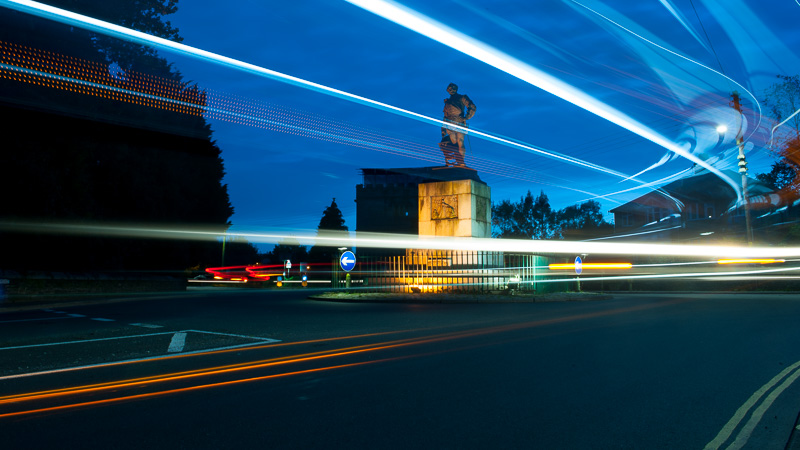
The picture at the top is one I particularly like taken of Drake’s statue on a roundabout in Tavistock, I like the big patches of light which were caused by a bus passing and the dotted orange lights were the indicators on a car. My hope for any shot like this is that something with different coloured lights will come past, a few blue lights would liven things up a bit.
Below is a you will find a link to my online gallery showing some of my traffic trail photography.